Just looking for the plans to make this? You can get the PDF plans for this double tilt-out garbage can cabinet on Etsy or download the SketchUp file for free.
I’m going on a work trip later this month, and Christina asked me if I would be able to build something to hide the kitchen trash and recycling cans before I leave (and before her mom visits). Challenge accepted!
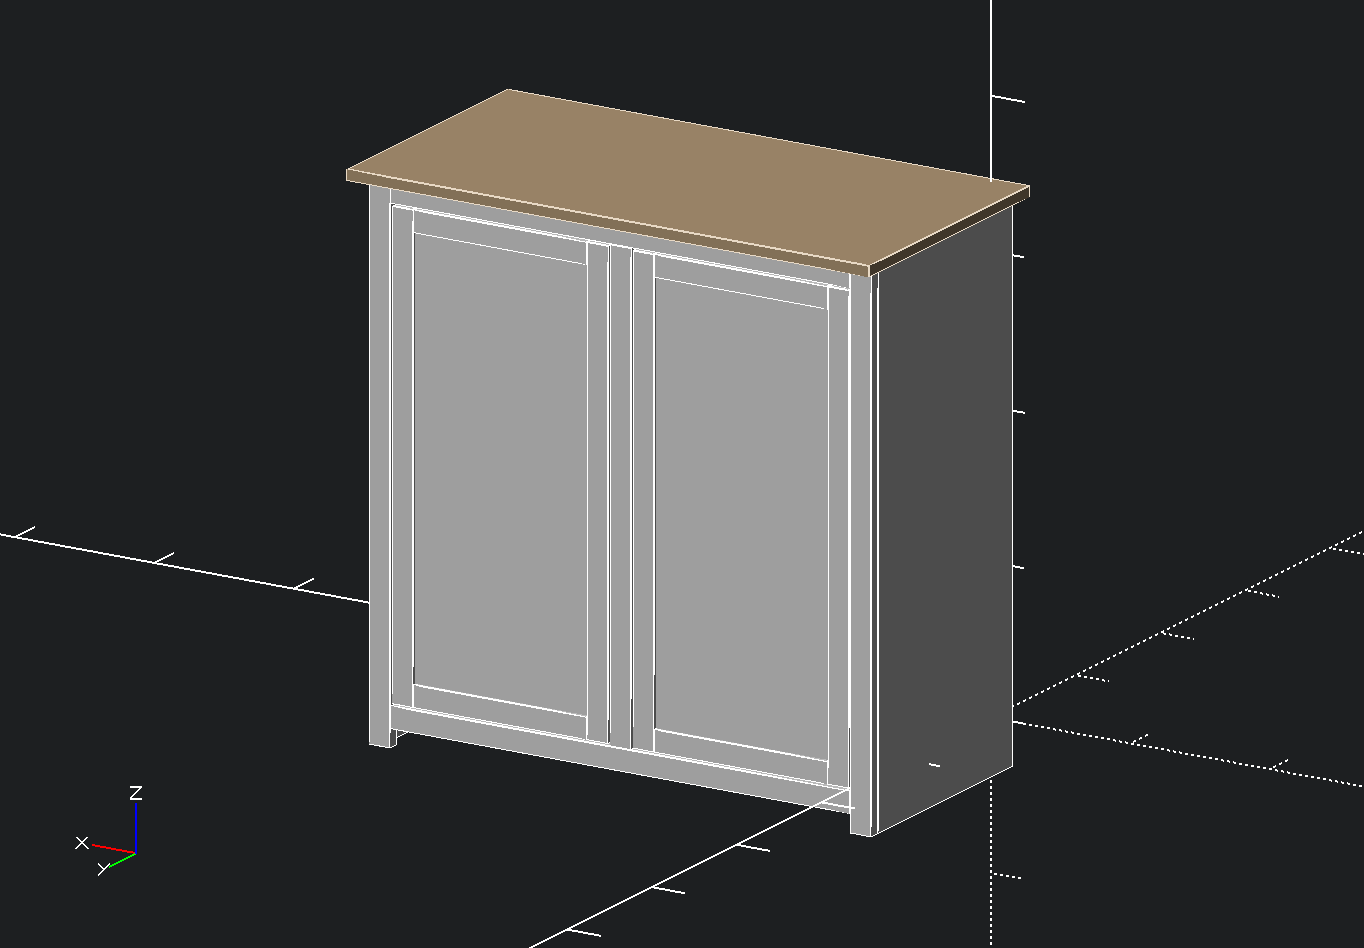
We brainstormed and came up with a tilt-out cabinet design. The first thing I did was model the cabinet in OpenSCAD. We hadn’t bought any garbage cans yet, so I made it customizable; I could specify any number of cans of any size, and the model would adjust and print out a cut list for me to bring to the lumberyard.
The script is available at on GitHub, and as you can see, it can even animate the tilting mechanism:

We settled on a two-can design (one for trash and one for recycling), but we did contemplate more… grandiose… ideas.

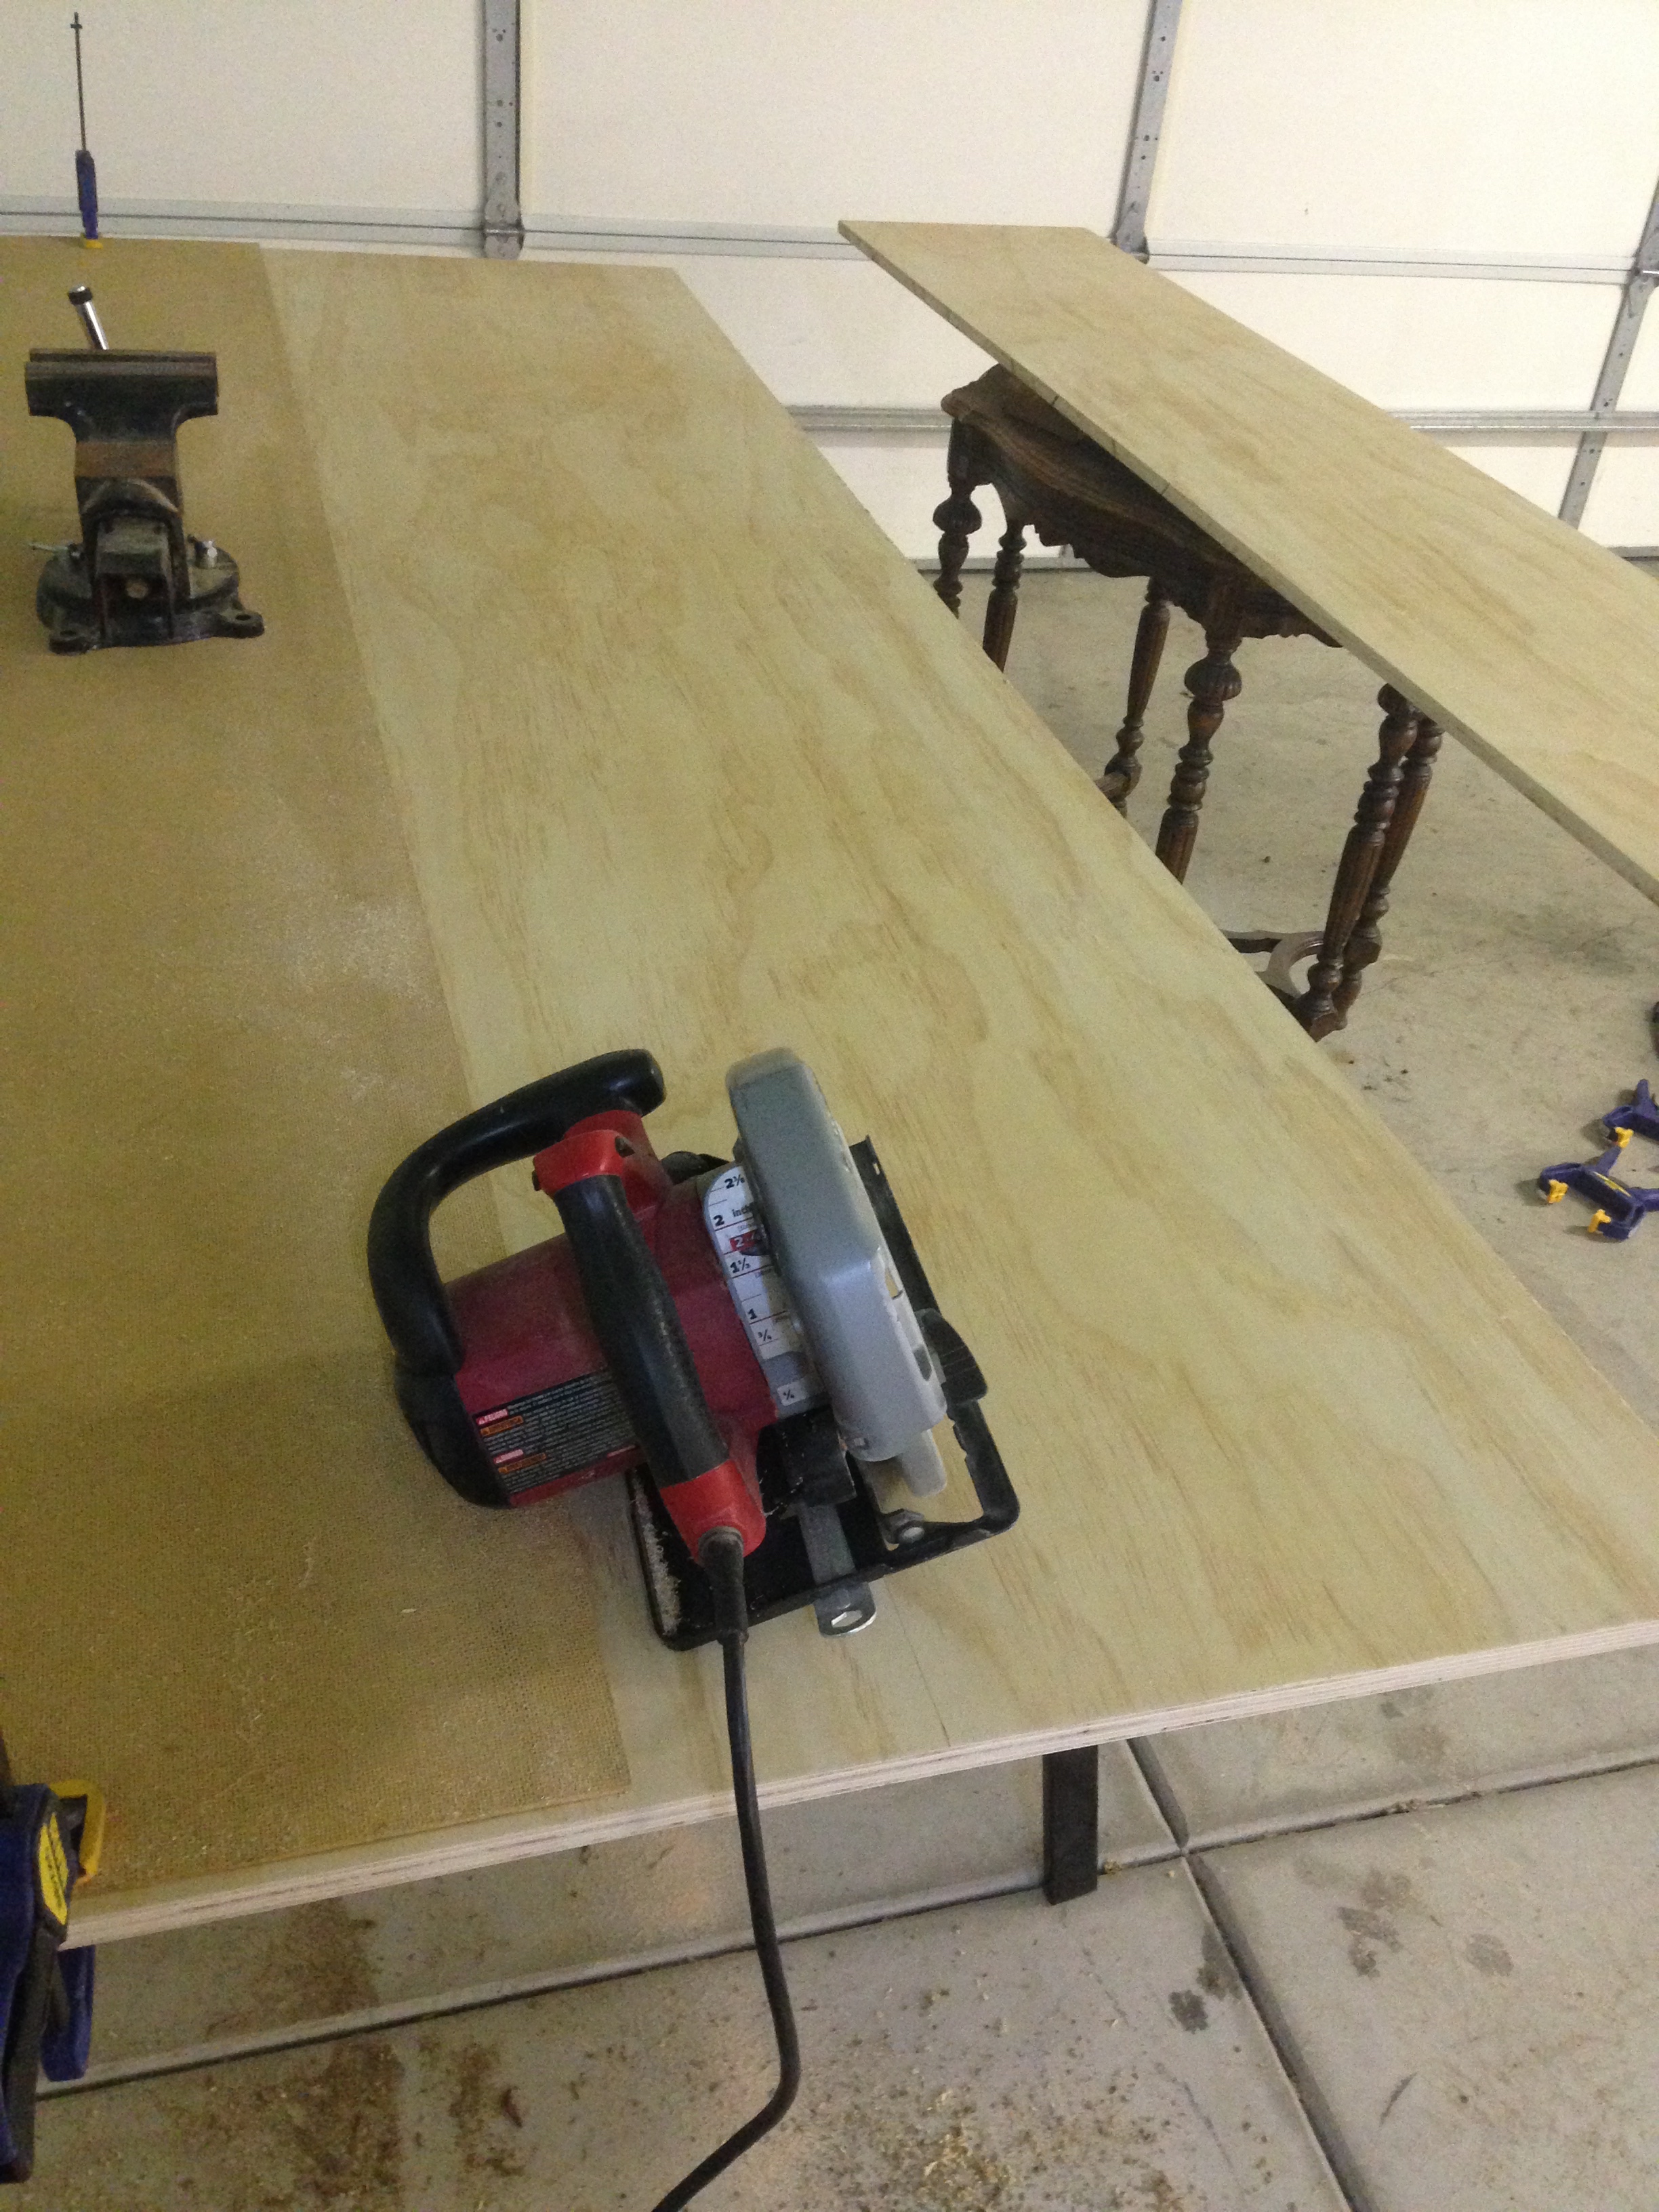
The sides and bottom of the cabinet were cut from one sheet of sanded plywood. I don’t have a track saw, so I made do with a circular saw and a straight edge.

After making these cuts, I finally ordered a dedicated fine-tooth blade for my circular saw to avoid tearout the next time I need to cut nice wood without a table saw. A 24-tooth blade is fine for 2x4s, but not for any visible edges on furniture.
The first thing I built was the part of the tilting door that holds the cans to make sure that the spacing and measurements were right.


The spacing and measurements were right.
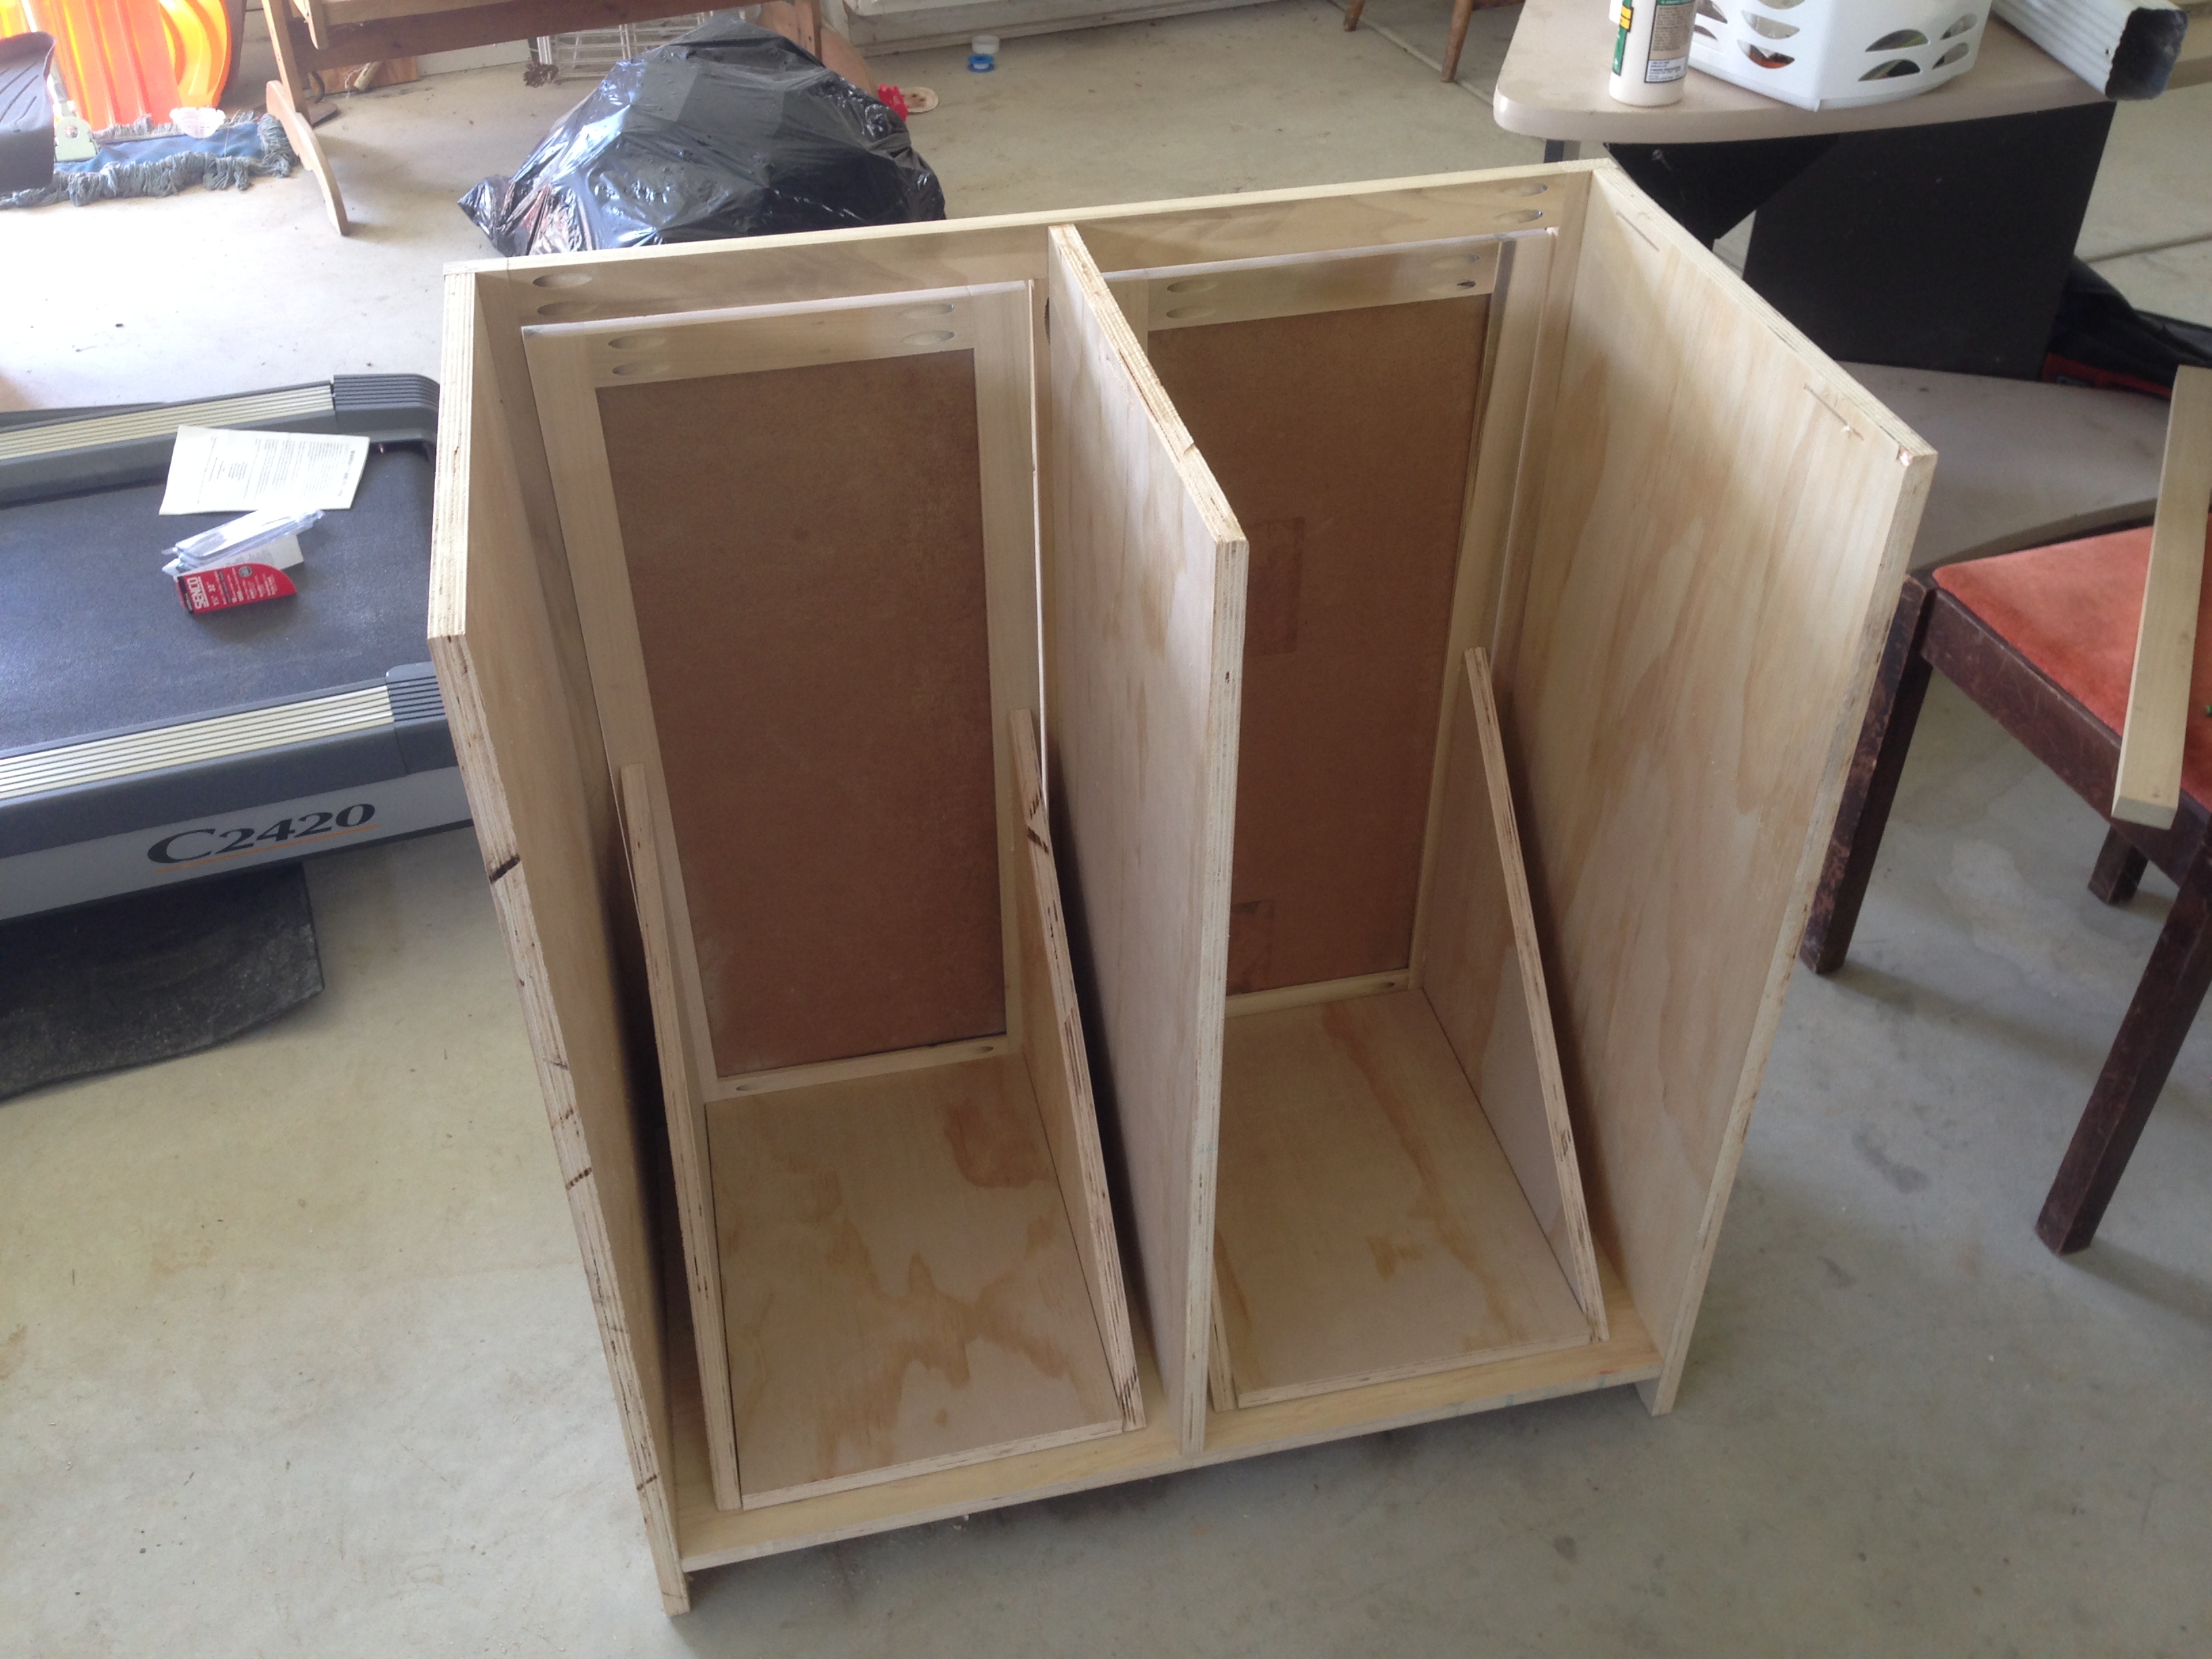
I cut the sides and center of the cabinet and then used a biscuit joiner to cut slots that will be used to attach the top with tabletop fasteners. This is similar to how I build our kitchen table, and this cabinet will be stained and painted to match.

I used my 90º clamps to hold the boards in place while I joined them with pocket screws.


Oops. It’s been a while since I’ve used pocket screws, and I forgot that it matters how long they are.
The center divider was joined with regular 2.5″ screws straight up the bottom.


This is how the cabinet bases will sit in the box. They sit closer to the center board than the side boards because the face frame will take up more space on the ends (where the board is flush with one side of the plywood) than in the middle, where the board is centered.
The face frame is 1×2″ poplar and pocket screws. I used poplar because it’s a cheap hardwood (although not too hard), and it takes paint well. It’s the same wood I built the apron of our kitchen table out of.


The cabinet top is made up of three red oak boards joined with biscuits and glue. These boards were left over from last year’s table build, so it will match exactly. When we moved in, I inherited a powerful jointer from the previous owner, so I was able to use that to square up the rough side of each board rather than using a router and a straightedge — major timesaver.

Here’s the top, cut to length and width and then sanded smooth. My new saw blade hadn’t come yet, so I had to cut these by hand. I should probably order a new handsaw too. It’s about 18″x33″, and sanding went a lot quicker than the 40″x84″ kitchen tabletop. I would say 83% quicker.
I stained the tabletop with Varethane’s Kona stain.

The cabinet doors are more 1×2 poplar with a groove on the inside to accept beadboard panels. Here’s a shot from behind after I nailed and glued the cabinet doors to the tilting bases. In the background, you can see a mystery bag, a computer desk, my shop treadmill, and a “telephone chair” that I’m going to refinish.


There’s 1/8″ space around each door, but I should have left an additional 1/8″ or at least 1/16″ on the bottom to allow for the space the hinges are going to take. It worked out in the end though, just a little closer than I would have liked.
Here’s the top after two coats of polyurethane and the cabinet after the first coat of paint (Sherwin Williams Creamy White).


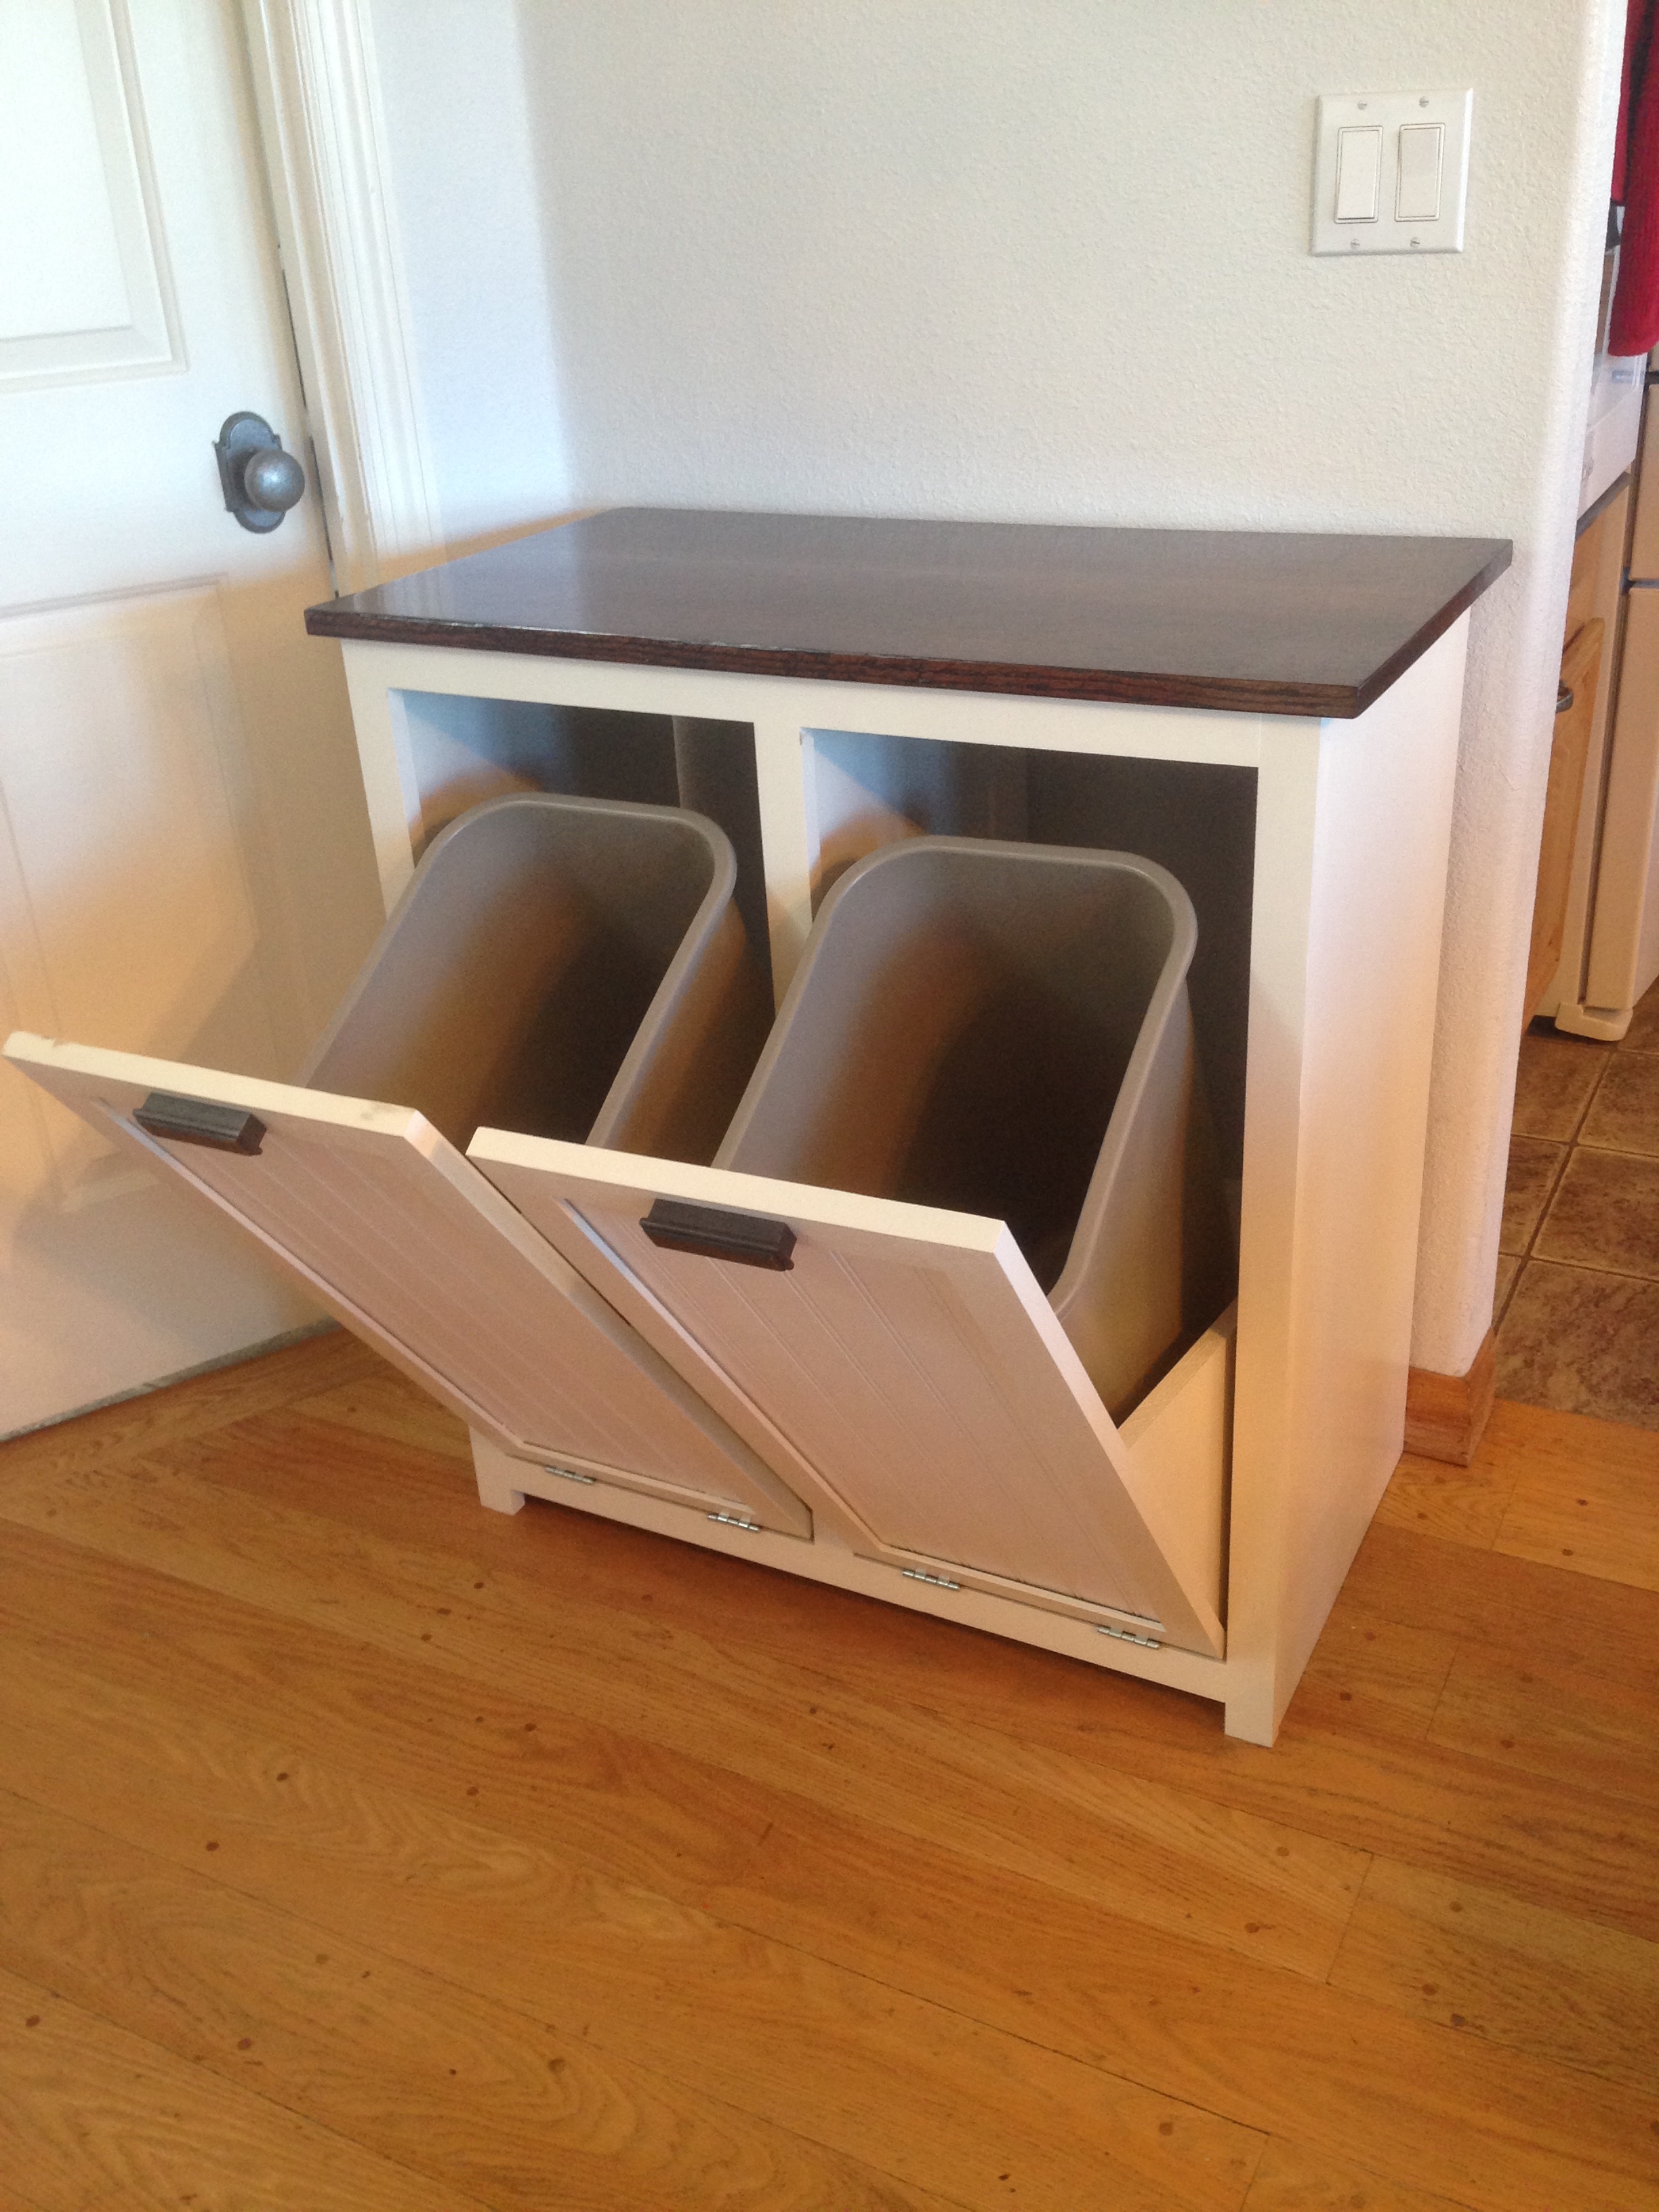
I attached the doors with hinges at the bottom and added a stop block to each side of the middle divider so the doors can’t fall all the way open. They stop at about 40º from vertical, leaving just enough room to remove the trash cans.

These spacers in the back ensure that the doors sit flush with the face frame. Since the hinges aren’t mortised in, they lift the fronts of the cabinet up about 3/16″, so the backs needs to be lifted accordingly.

Tada! The handles match the arts and crafts cabinet in the next room, so this piece really brings the whole house together.

Double tada!
After using it for a couple of days, it’s clear that I’m going to want to add some sort of soft-close mechanism. Other than that, I’m very happy with how it turned out. It was my first time building my own cabinet doors, my first time using a jointer, and the last time I’ll ever have to see garbage cans in my kitchen.
Update: Here’s a gallery of finished cabinets from readers like you. If you use my plans, send a photo of your finished project to me at cfinke@gmail.com so I can show it off here!

 Do you have an


")


")


